This post is also available in:
![]() Português
Português
In this article, I will show you in details how to create the new released 18c Oracle Database on Oracle Cloud Infrastructure Classic.
1. Creating Trial Account
Go to cloud.oracle.com and click on right up corner in "Try for Free". In the new opened page, click on "Create a Free Account".
In this page you need to fill all your personal information, including credit card and accept the terms and conditions. Don't worry about inserting your credit card there, you won't be charged unless you explicit upgrade your account later. Some very small fees (like US$ 1) will be done and refunded just to check if the credit card is valid.
After you fill all the form and press "Complete", some minutes later you will receive an email with your credits, username, temporary password and cloud account name:
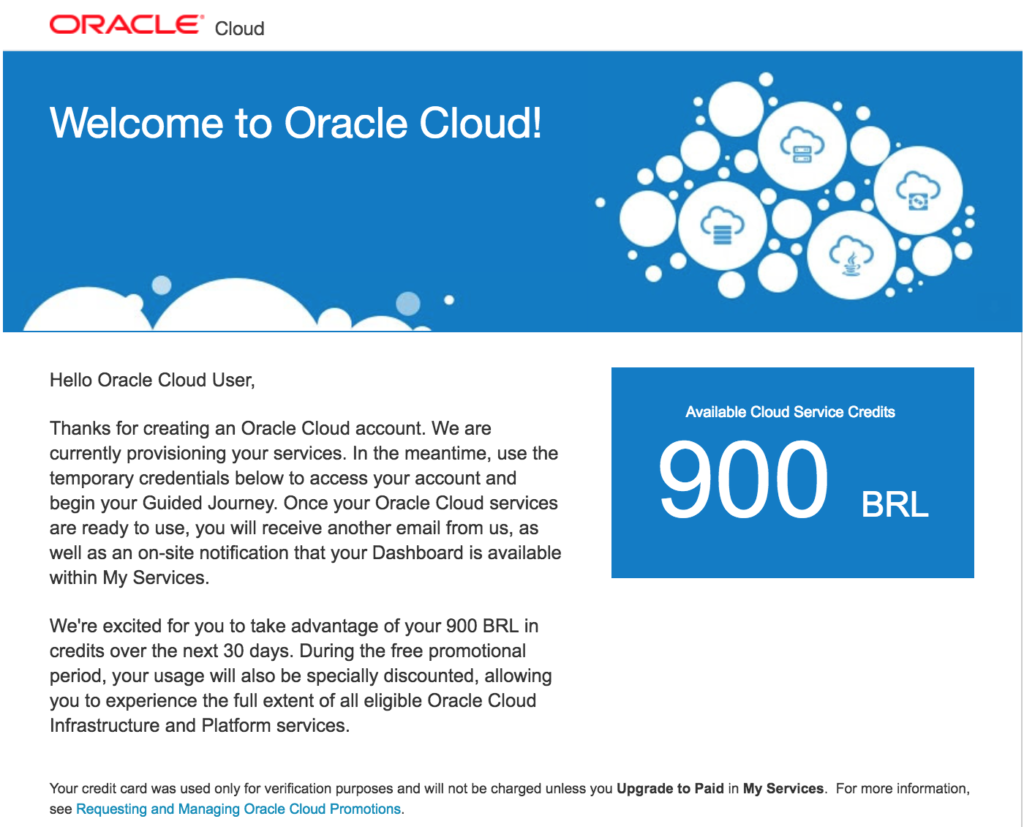
In Brazil we receive 900 BRL (our currency) in credits.
Now log in your cloud clicking on "Get Started with Oracle Cloud" in the email you received. Change your temporary password, and now is time to play. =]
2. Getting PSM
When your account is all set, let's start the pre-reqs to create the 18c DB instance.
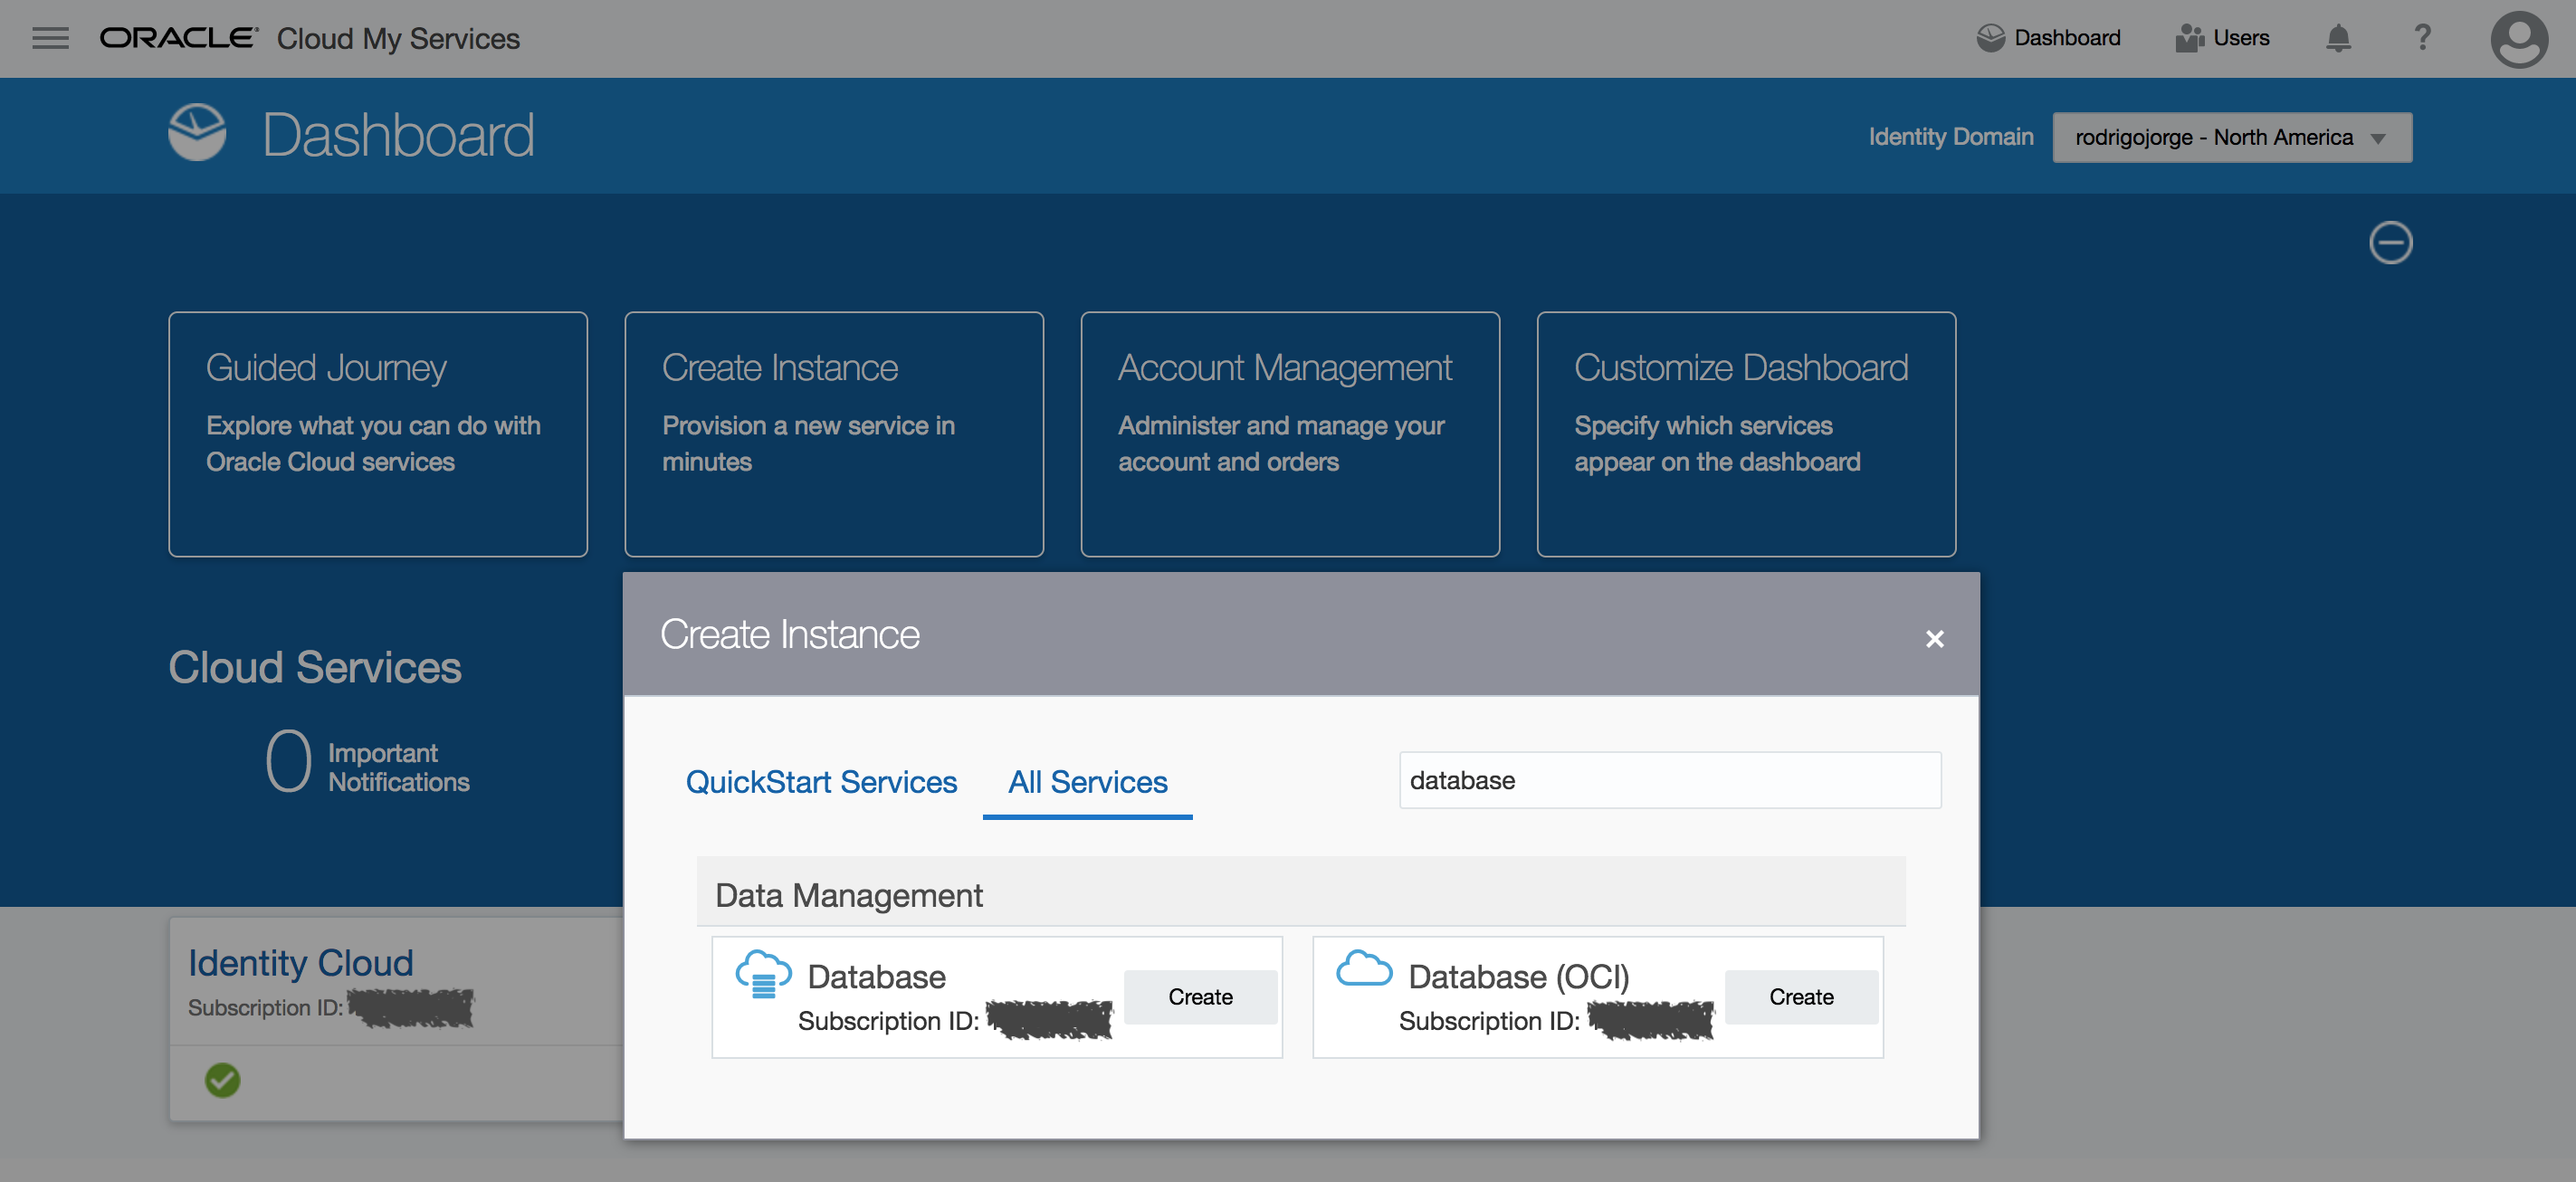
Click on Create Instance in your main dashboard. Then go to All Services tab and search for "database".
Click Create for normal Database, not OCI (normal means Classic in this context). After you are redirected to a new window, click in Custom to personalize your DB.
Note that on the time I'm writing this article (Feb/2018), there is still no option to create a 18c via cloud interface:
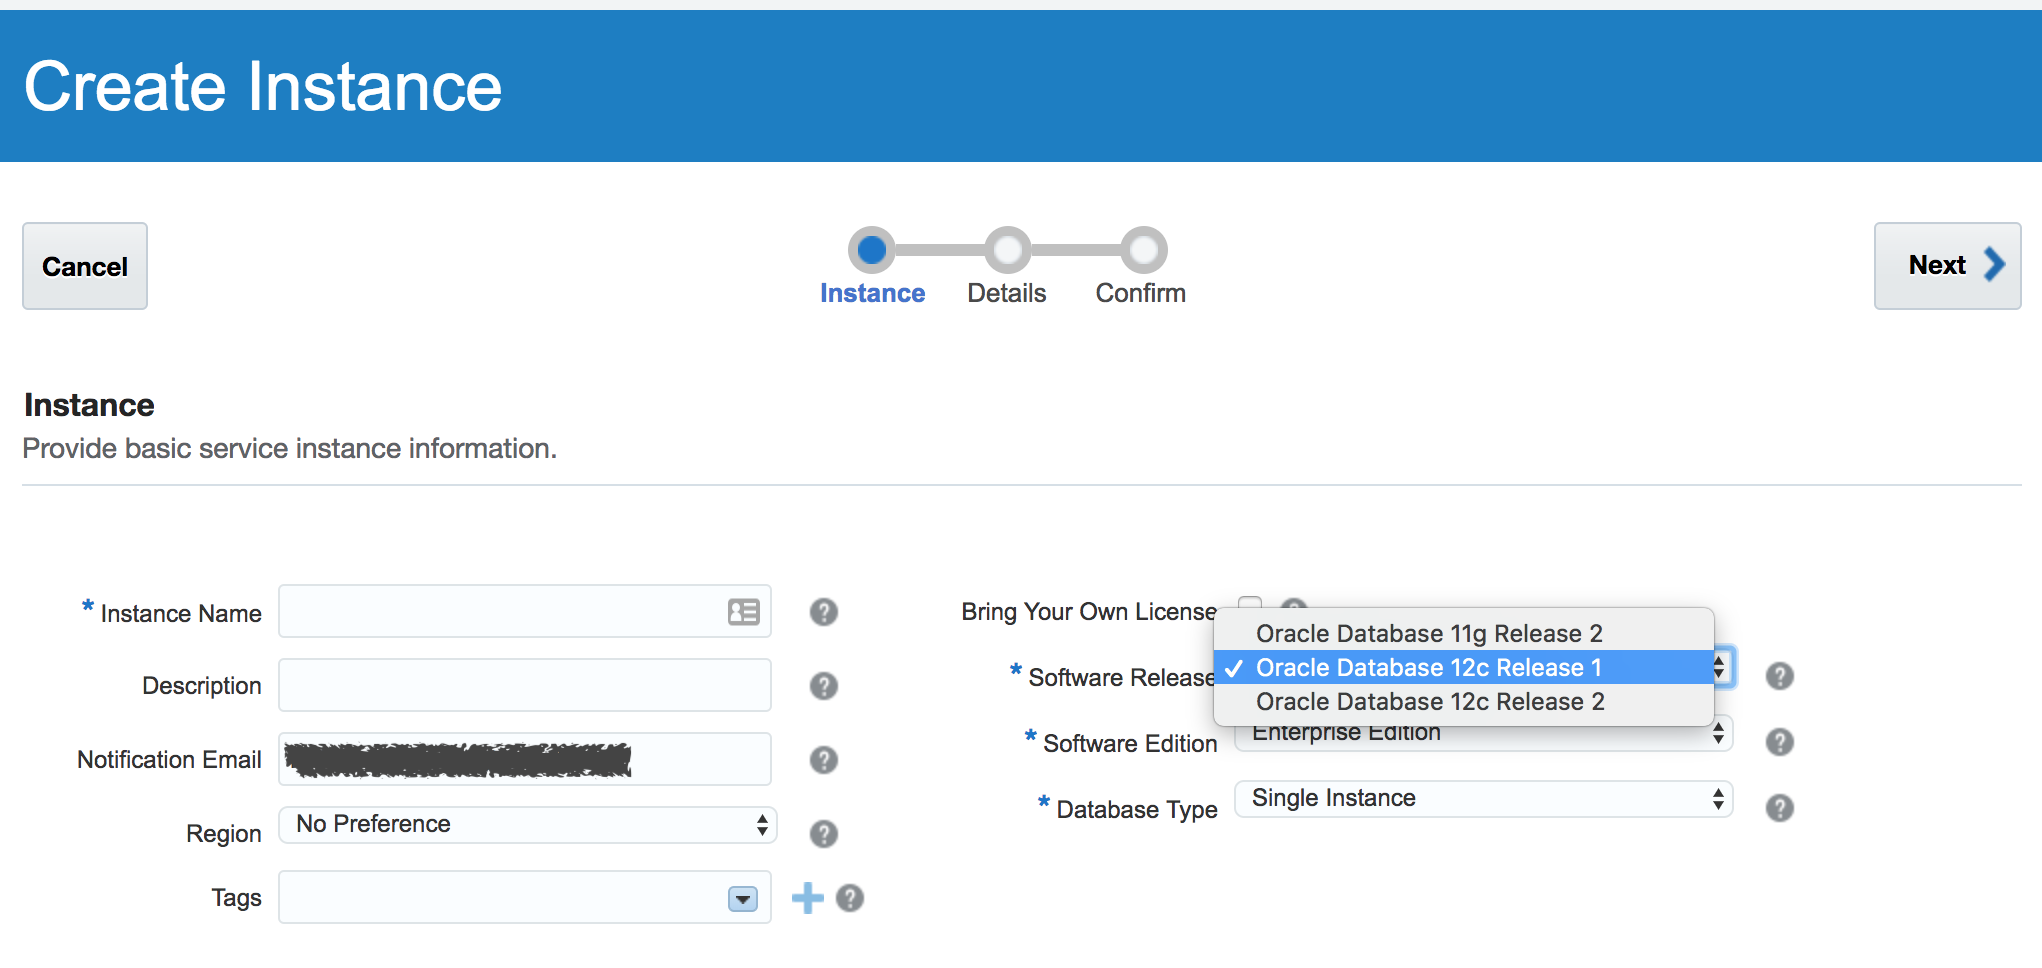
So we need to use another approach, like REST calls or PSM. For this article we are using PSM which is easier to use. The official doc for it is described at:
To download the PSM tool, click on the Downloading the Command Line Interface link in above URL and follow the instructions. In my case, I used REST API to get it:
[root@myserver ~]# curl -X GET -u myemail@gmail.com:MyPass.123 \
-H X-ID-TENANT-NAME:idcs-172740ebxxxxxxxxxxxxxxxxxxxxxxx \
https://psm.us.oraclecloud.com/paas/core/api/v1.1/cli/idcs-172740ebxxxxxxxxxxxxxxxxxxxxxxx/client \
-o psmcli.zip
  % Total    % Received % Xferd  Average Speed   Time    Time     Time  Current
                                 Dload  Upload   Total   Spent    Left  Speed
100 80689    0 80689    0     0  45046      0 --:--:--  0:00:01 --:--:-- 45052
[root@myserver ~]# ls -lah psmcli.zip
-rw-r--r--. 1 root root 79K Feb 27 17:21 psmcli.zip
[root@myserver ~]#
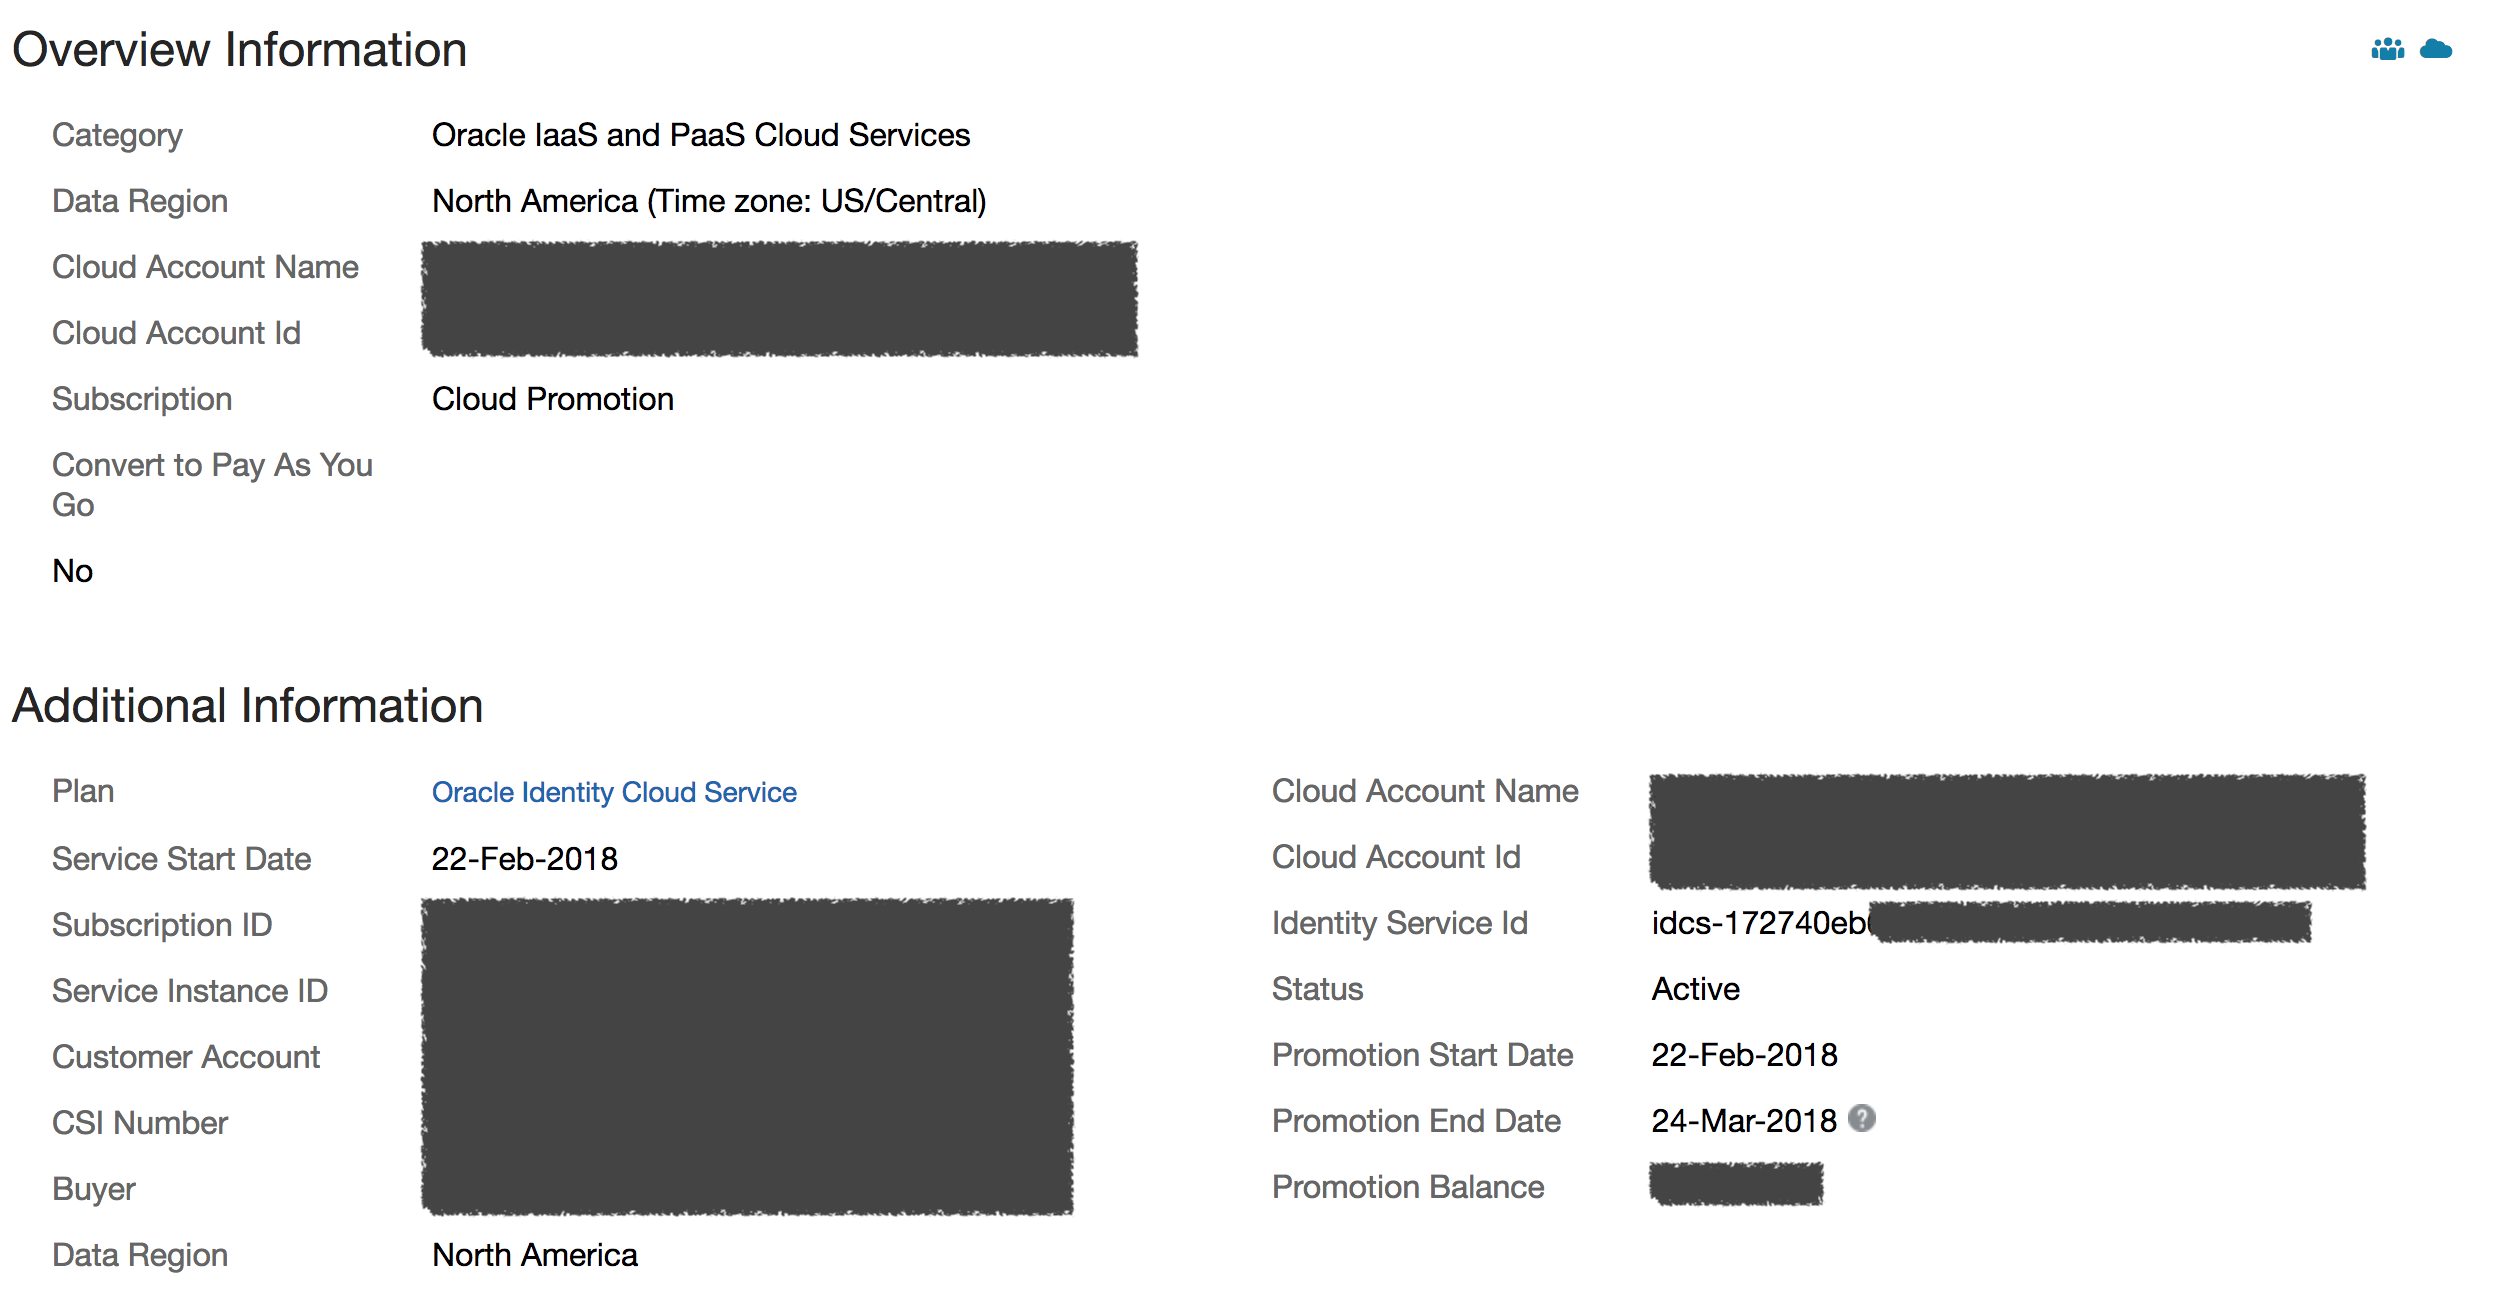
You need to have curl, and also your password may not have special characters that can be misinterpreted by your shell (like $). To find out what your identity domain name is, just open your Oracle Identity Cloud Service in your Dashboard and check your Identity Service Id. It starts with "idcs-":
With PSM downloaded, next step is to install and configure it.
I won't go into details about the pre-reqs for installing it, like python3 requirement. If you don't have it in your system, I recommend to download, configure, make and install it. Don't forget openssl-devel package dependency to avoid problems with pip3. Take a look in this articles if you need help with python3:
- https://www.tecmint.com/install-python-in-linux/
- https://stackoverflow.com/questions/41489439/pip3-installs-inside-virtual-environment-with-python3-6-failing-due-to-ssl-modul
Installing PSM:
[root@myserver ~]# pip3 install -U psmcli.zip
Processing ./psmcli.zip
Collecting requests<=2.8.1,>=2.7.0 (from psmcli==1.1.20)
  Downloading requests-2.8.1-py2.py3-none-any.whl (497kB)
    100% |████████████████████████████████| 501kB 493kB/s
Collecting keyring<=5.6,>=5.4 (from psmcli==1.1.20)
  Downloading keyring-5.6.tar.gz (69kB)
    100% |████████████████████████████████| 71kB 4.0MB/s
Collecting colorama==0.3.3 (from psmcli==1.1.20)
  Downloading colorama-0.3.3.tar.gz
Collecting PyYAML==3.11 (from psmcli==1.1.20)
  Downloading PyYAML-3.11.zip (371kB)
    100% |████████████████████████████████| 378kB 581kB/s
Installing collected packages: requests, keyring, colorama, PyYAML, psmcli
  Running setup.py install for keyring ... done
  Running setup.py install for colorama ... done
  Running setup.py install for PyYAML ... done
  Running setup.py install for psmcli ... done
Successfully installed PyYAML-3.11 colorama-0.3.3 keyring-5.6 psmcli-1.1.20 requests-2.8.1
[root@myserver ~]#
Now we need to do a one-time setup to be able to call the API:
[oracle@myserver ~]$ psm setup
Username: myemail@gmail.com
Password:
Retype Password:
Identity domain: idcs-172740ebxxxxxxxxxxxxxxxxxxxxxxxx
Region [us]:
Output format [short]:
Use OAuth? [n]:
----------------------------------------------------
'psm setup' was successful. Available services are:

  o ADWC : Oracle Autonomous Data Warehouse Cloud
  o ADWCP : Oracle Autonomous Data Warehouse Cloud Platform
  o ANALYTICS : Oracle Analytics Cloud
  o APICS : Oracle API Platform Cloud Service
  o APICatalog : Oracle API Catalog Service
  o APISearch : Oracle APICatalog Elasticsearch Service
  o BDCSCE : Oracle Big Data Cloud
  o BOTSCFG : Oracle Bots Configuration Service
  o BOTSCON : Oracle Bots Connector Service
  o BOTSINT : Oracle Bots Intent Service
  o BOTSMGM : Oracle Bots Management API Service
  o BOTSPIP : Oracle Bots Pipeline Service
  o BigDataAppliance : Oracle Big Data Cloud Service
  o CONTAINER : Oracle Container Cloud Service
  o CXAANA : Oracle CxA Analytics Service
  o CXACFG : Oracle CxA Configuration Service
  o CXACOL : Oracle CxA Collector Service
  o CXAPOD : Oracle CxA Pod Cloud Service
  o ContainerRegistry : Oracle Container Registry Service
  o DHCS : Oracle Data Hub Cloud Service
  o IDCS : Oracle Identity Cloud Service
  o IDCSControlPlane : Oracle Identity Cloud Service
  o IOTAssetMon : Oracle IoT Asset Monitoring Cloud Service
  o IOTConnectedWrker : Oracle IoT Connected Worker Cloud Service
  o IOTEnterpriseApps : Oracle Internet of Things Cloud - Enterprise
  o IOTFleetMon : Oracle IoT Fleet Monitoring Cloud Service
  o IOTProdMonitoring : Oracle IoT Production Monitoring Cloud Service
  o IOTSvcAsset : Oracle IoT Asset Monitoring CX Cloud Service
  o IntegrationCloud : Oracle Integration Cloud
  o jcs : Oracle Java Cloud Service
  o MobileCCC : Oracle Mobile Custom Code Container
  o MobileCorePOD : Oracle Mobile Core POD
  o MySQLCS : Oracle MySQL Cloud Service
  o OAICS : Oracle Adaptive Intelligence Applications Offers Cloud Service
  o OEHCS : Oracle Event Hub Cloud Service
  o OEHPCS : Oracle Event Hub Cloud Service - Dedicated
  o OMCE : Oracle Mobile Cloud Metering Service
  o OMCEXTERNAL : Oracle Management Cloud Service
  o OMCP : Oracle Management Cloud Platform Service
  o SOA : Oracle SOA Cloud Service
  o VisualBuilder : Oracle Visual Builder Cloud Service
  o accs : Oracle Application Container Cloud Service
  o caching : Oracle Application Cache
  o containerPod : Oracle Container Cluster Service
  o dbcs : Oracle Database Cloud Service
  o dics : Oracle Data Integration Platform Cloud Service
  o ggcs : Oracle GoldenGate Cloud Service
  o stack : Oracle Cloud Stack Manager
----------------------------------------------------
[oracle@myserver ~]$
Finally, let's proceed with the instance creation.
3. Creating DB 18c instance
So first of all let's check the syntax of the "create-service" command for dbcs in PSM:
[oracle@myserver ~]$ psm dbcs create-service help

DESCRIPTION
  Create an Oracle Database Cloud Service instance

SYNOPSIS
  psm dbcs create-service [parameters]
       -c, --config-payload <value>
       [-of, --output-format <value>]
       [-wc, --wait-until-complete <value>]

AVAILABLE PARAMETERS
  -c, --config-payload    (file)
       Path to JSON file containing Oracle Database Cloud Service provisioning
       configuration parameters

  -of, --output-format    (string)
       Desired output format. Valid values are [short, json, html]

  -wc, --wait-until-complete  (boolean)
       Wait until the command is complete. Valid values are [true, false]. Default is
       false.

EXAMPLES
  psm dbcs create-service -c /home/templates/create-dbcs-service.json

[oracle@myserver ~]$
So basically, by what we can see above, we pass a JSON file as parameter and have it created. For more information about this JSON full available syntax, check this doc:
I'm configuring a very simple database for study only, so my file is as below:
[oracle@myserver ~]$ cat db18c.json
{
  "description": "Example 18c instance",
  "edition": "EE",
  "level": "PAAS",
  "serviceName": "db18c-ee-si",
  "shape": "oc3",
  "subscriptionType": "HOURLY",
  "version": "18.0.0.0",
  "vmPublicKeyText": "ssh-rsa AAAAB3Nz....BNssKoejUo0eSQ== rodrigo.jorge",
  "parameters": [
    {
      "type": "db",
      "usableStorage": "15",
      "adminPassword": "Welcome_1",
      "sid": "orcl",
      "pdbName": "pdb01",
      "failoverDatabase": "no",
      "backupDestination": "NONE"
    }
  ]
}
Add "isBYOL": true in case you already have license for it and wants the "Bring Your Licence" option. This will make the credits to last longer.
And after it's ready, let's request the instance creation:
[oracle@myserver ~]$ psm dbcs create-service -c db18c.json
Job ID : 22033121
[oracle@myserver ~]$
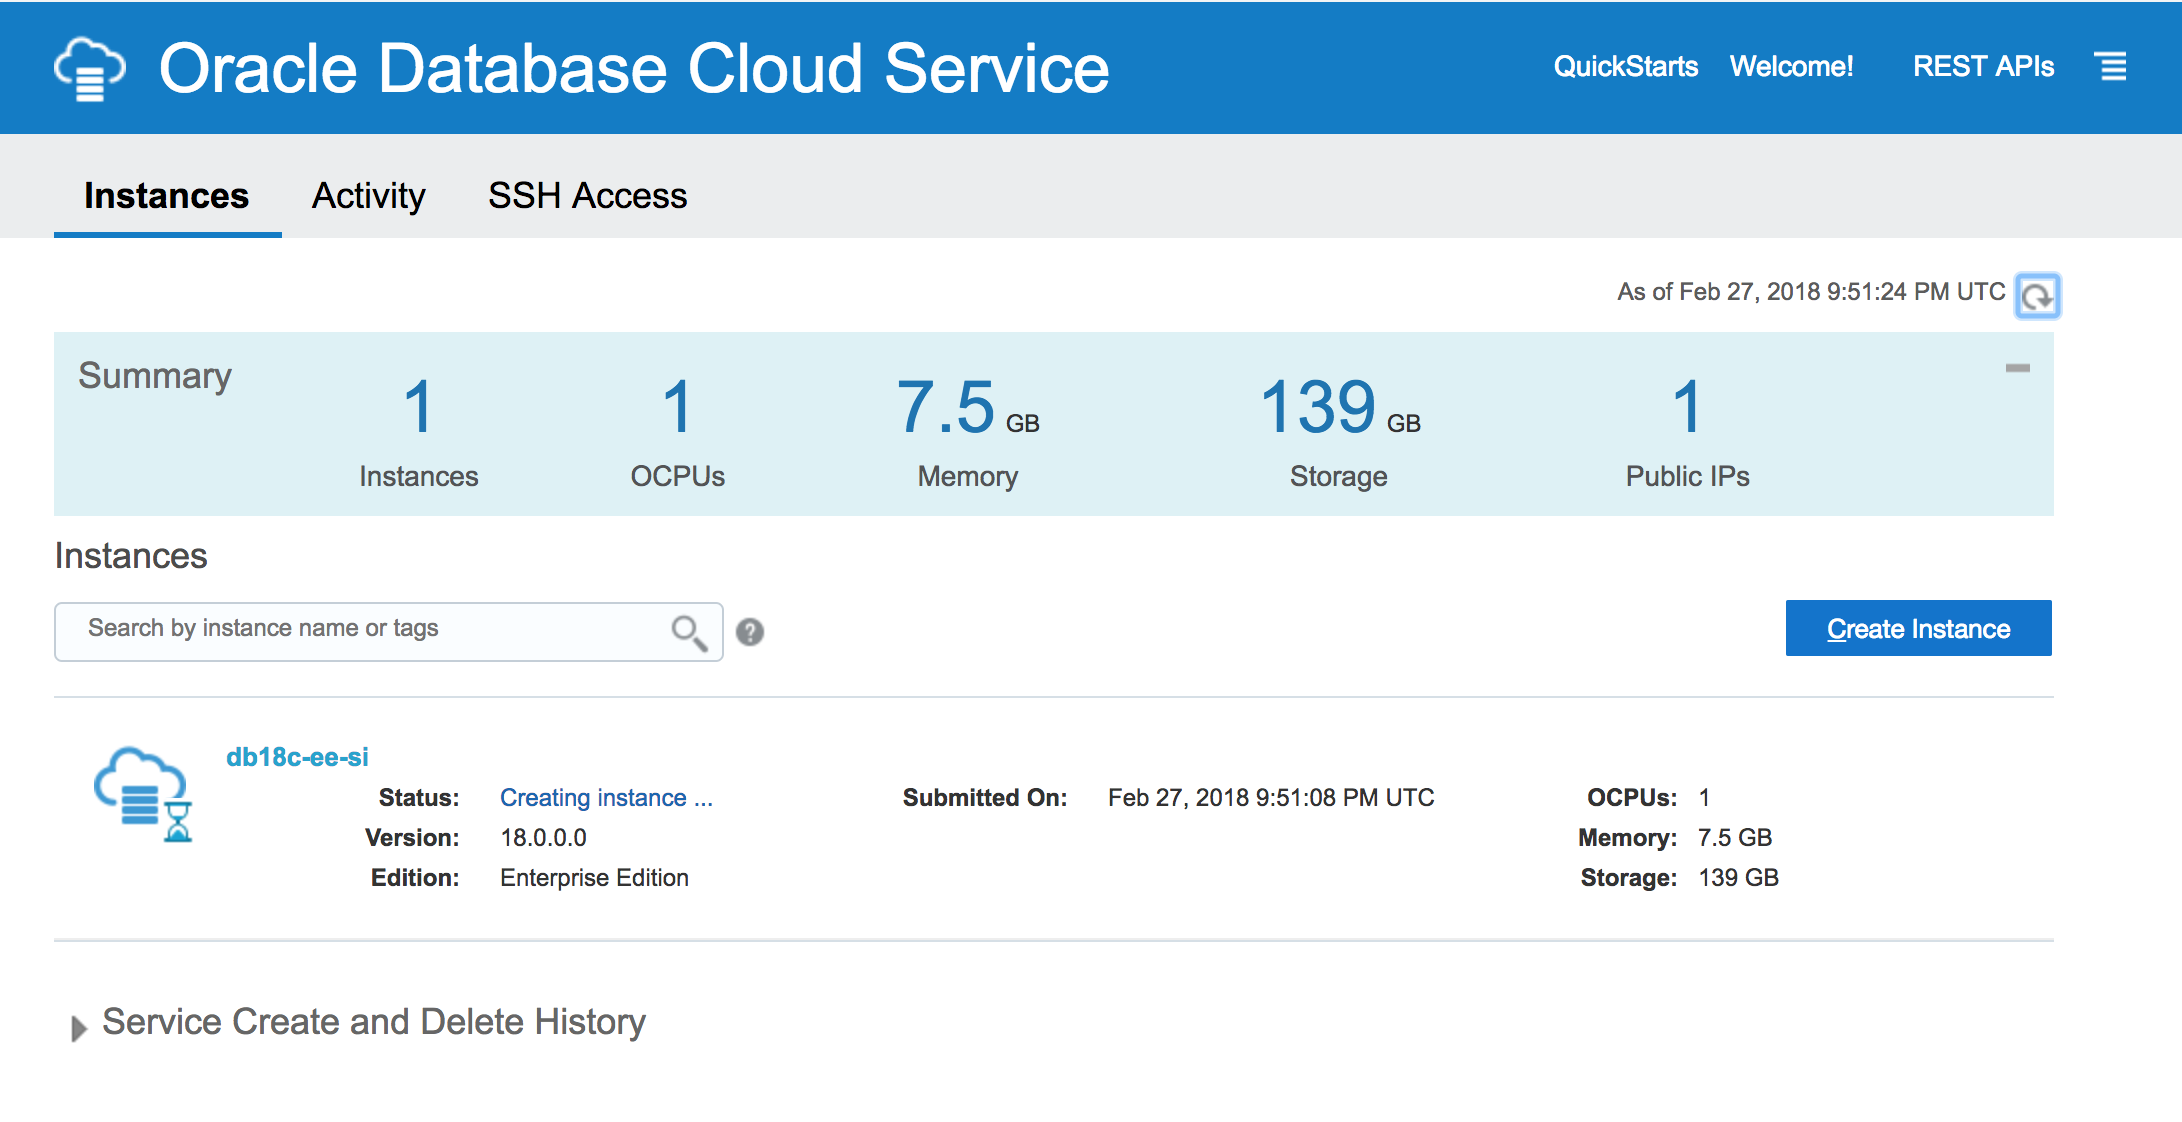
Good! Now we wait until the creation finishes. You can monitor the creation status through the DBCS panel. To access it, in Dashboard page, click on left upper menu, wait until Services option become available and then click on Database.
When it gets ready, open it to check the IP and connect using SSH:
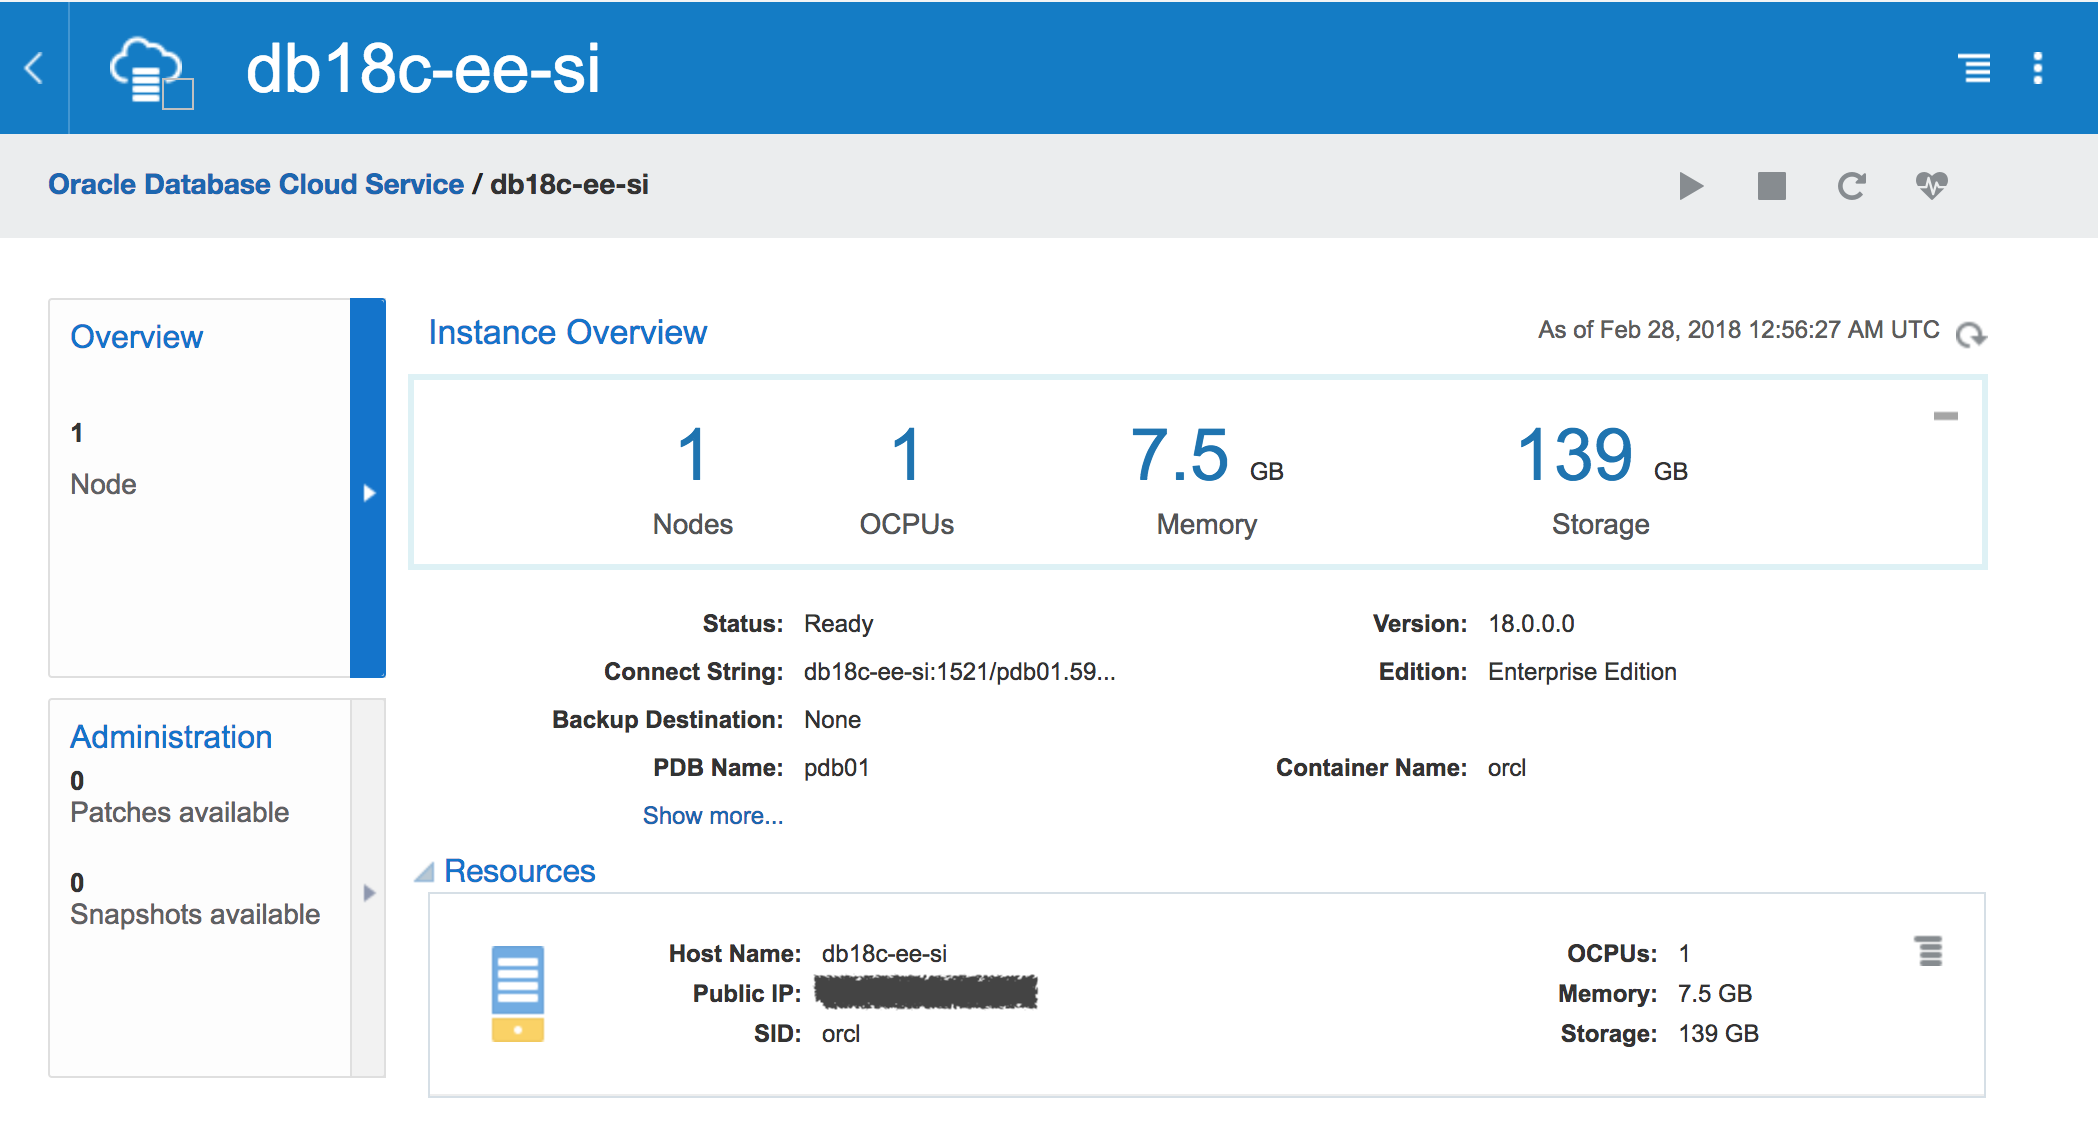
Now connect to the machine via SSH and check your brand new database:
[oracle@myserver ~]$ ssh opc@129.X.X.X
Enter passphrase for key '/home/oracle/.ssh/id_rsa':
[opc@db18c-ee-si ~]$ sudo su - oracle
[oracle@db18c-ee-si ~]$ ps -fu oracle | grep pmon
oracle    9404  9339  0 01:03 pts/0    00:00:00 grep pmon
oracle   12470     1  0 Feb27 ?        00:00:00 ora_pmon_orcl
[oracle@db18c-ee-si ~]$ . oraenv
ORACLE_SID = [orcl] ?
The Oracle base remains unchanged with value /u01/app/oracle
[oracle@db18c-ee-si ~]$ sqlplus / as sysdba

SQL*Plus: Release 18.0.0.0.0 Production on Wed Feb 28 01:03:51 2018
Version 18.1.0.0.0

Copyright (c) 1982, 2017, Oracle.  All rights reserved.


Connected to:
Oracle Database 18c Enterprise Edition Release 18.0.0.0.0 - Production
Version 18.1.0.0.0

SQL> show pdbs

    CON_ID CON_NAME			  OPEN MODE  RESTRICTED
---------- ------------------------------ ---------- ----------
	 2 PDB$SEED			  READ ONLY  NO
	 4 PDB01			  READ WRITE NO
SQL>
Credits:
- Martin Berger, at https://www.martinberger.com/?p=4652 which gave me the idea of using PSM instead of pure REST.
Happy 18c playing.
Have you enjoyed? Please leave a comment or give a 👍!


